Friday, 25 July 2014

Easy Chicken Caesar Macaroni and Cheese

Hey there,

So last night I found myself trying to figure out what to make for supper...yet again. I wanted something different than our normal every day meals but it was so warm in our house I didn't want anything to complex or time consuming. I am told this happens to everyone but I find it is happening so much more while I am pregnant. I kind of wanted Fettuccine Alfredo but I didn't have all of the ingredients so I figured you know what I will wing it tonight and hope it turns out well. Fortunately it did. My husband was in love with this meal he took a heaping helping in his lunch today. Our son just could not get enough of it, but for a 3 year old even that isn't a whole lot. I really hope you enjoy this recipe I know we did.

Ingredients:

  • 3 cups uncooked pasta
  • 4 raw chicken breasts
  • 2 cups shredded cheese
  • 2 oz cream cheese
  • 3 tbsp Caesar salad dressing
  • 1 cup chopped spinach
  • salt to taste
  • pepper to taste
  • 2 cups milk
  • 1/4 c + 1/4 c butter or margarine plus (keep separate)
  • 2 tbsp flour
  • 1 onion chopped
Instructions:
  1. Melt 1/4 c butter in a large frying pan. 
  2. While the butter is melting chop your chicken into small chunks.
  3. Cook your noodles until they are "al dente" or just soft.
  4. When your chicken is cooked place it into a large bowl and set aside.
  5. When your noodles are done strain them and put them in the bowl with your chicken.
  6. In a pot (you can use the same pot you cooked your noodles in) melt your butter with your milk.
  7. Add in the salt, pepper, onion and spinach and stir. Let this cook until it starts to boil hard (it will start to foam). 
  8. Remove the sauce from the heat and stir in your cheese, cream cheese and salad dressing. Stir until it is all combined.
  9. Pour the sauce over your chicken and noodles and enjoy.

Friday, 11 July 2014

Fast and Simple Nap Time Blanket

Hi there, I don't know about you but my son loves having a special item from home for nap-time at his daycare. Occasionally however things get forgotten or ... messy. So I decided that we would make him a special nap-time blanket that could be left at his daycare unless it needed to be washed so that it would not be forgotten anymore. He was in love with this project and it didn't take long enough that he got bored before it was completed. This is just a simple tie blanket that takes about an hour to make from start to finish. I have also made scaled up versions as well as versions that are a little more work because they are made up of squares but this one is just perfect for a little one.

Materials:

  • Scissors
  • 2 pieces of fleece 1 meter in length (make sure they are the same width for a twin bed get 1 1/2 meters).
Instructions:
  1. Lay out your fabric and meet up the corners, try to lay it flat so that your edges stay together nicely. 
  2. Cut a 4 inch square out of each of the corners. 
  3. Cut 4 inch lines all around the outside of the blanket approximately 1 inch apart (to make strips along the outside). 
  4. Tie the strips together all around the outside using your knot of choice. 
  5. Stretch the material to get your nice rectangular shape. 
  6. Enjoy your new blanket.

Please use caution when using sharp objects.

Wednesday, 2 July 2014

Canned Plum Sauce

Like many others the boys in my house love plum sauce with their chicken. I thought I would try my hand at it this year and it turned out to be really easy, just a little time consuming. With plum season starting I will definitely be making a second batch.

Ingredients: about 10 jam jars

  • 2 cups brown sugar (lightly packed)
  • 1 cup white sugar
  • 3/4 cup finely chopped onion
  • 1 tbsp red pepper flakes
  • 2 tbsp mustard seed
  • 1 tbsp salt
  • 2 cloves of garlic finely chopped
  • 1 tbsp ginger root finely chopped
  • 1 cup of cider vinegar
  • 10 cups chopped and pitted plums
Instructions:
  1. Combine all of your dry ingredients in your pot. 
  2. Mix in your onion, garlic and ginger root.
  3. Pour in your cider vinegar and heat on medium heat until the mixture comes to a boil. 
  4. Add your plums and return the mixture to a boil. 
  5. When the mixture starts to boil turn down the heat and let it cook down until the sauce thickens this can take anywhere from 45 minutes to 2 1/2 hours. 
  6. Put the sauce into hot jars and process in a hot water bath. For me this took about 25 minutes but check based on your altitude. 
  7. Leave the jars to cool undisturbed for 12 - 24 hours.


Enjoy your plum sauce but please use caution when handling hot tools and ingredients. Please follow USDA guidelines for canning.


Friday, 27 June 2014

Fan Page Reminder

Hey everyone just a reminder that there is a fan page set up on Facebook where you can find out about new posts before they come up.

Thursday, 26 June 2014

Strawberry Pie Fill

Well strawberry season is upon us and I don't know about you but I am loving it. I have already made a triple batch of my strawberry jam recipe I shared with you last year. Wow it is hard to believe I started this blog almost a year ago, where has the time? But I digress. Strawberries are huge right now and perfect for canning, what a great to the start of canning season. Something new I tried this year by request is canning strawberry pie fill. It turned out amazingly well, we LOVE it and it really wasn't as hard as I had worried it would be.

One note though before we start is to make sure you have at least an inch of water above the jars when you are processing, I didn't have quite that much and the top inch of my pie fill is a little more pink than red. Nothing wrong with it just the water ran low for a little bit near the end.

Ingredients: for about 2 quarts

  • 7 cups of chopped strawberries
  • 1 1/2 cups white sugar
  • 1/2 cup Clear Gel (spelled Clear Jel in the United States) not any other version or thickener
  • 2 cups cold water
  • 7 tsp lemon juice
Instructions:

  1. Blanche your strawberries for 1 minute. This involves putting your strawberries in boiling water for 1 minute than straining them.  Put them in a covered bowl.
  2. Mix your Clear Gel and sugar in a large stock pot or canning pot. (Clear Jel/Gel is the only approved thickener by the USDA). Add your cold water and whisk the ingredients together. Add heat and stir often until the mixture thickens and begins to bubble, this does not take long so be sure to keep a close eye on it. 
  3. Add your lemon juice and stir constantly until it starts to bubble again.
  4. Remove from heat and gently fold in the strawberries, stir gently. 
  5. Put the pie fill into your hot jars and tighten until hand tight.
  6. Seal the jars with a hot water bath, this took me 40 minutes. Again make sure the jars are completely covered in water for the entire processing time. 


As you can see the top is a little pink as opposed to red there is nothing wrong with it just the water ran a little low near the end. 

Please follow USDA guidelines for canning and use caution when handling hot dishes and ingredients. 

Saturday, 21 June 2014

Pumpkin Banana Muffins

Hi there, sorry about the delay I meant to get this post up last night but our internet went down. This recipe is tasty as well as somewhat healthy. My partner and son love it with my canned apple butter. This recipe is simple and only uses 1 bowl which is a bonus for doing dishes after. This is also a good way to use up some of the canned or frozen pumpkin that is taking up room in your house.

Ingredients:
  • 3 cups flour ( I used whole wheat but you can use whichever flour you prefer)
  • 2 tsp baking soda
  • 1/2 tsp baking powder
  • 1/2 tsp salt
  • 2 tsp cinnamon
  • 1 tsp ground ginger
  • 1/2 cup oil of your choice ( I have used vegetable, sunflower and olive in the past all have worked well)
  • 1 banana mashed
  • 3 eggs
  • 3/4 cup maple syrup (1 cup if you like sweet muffins)
  • 2 cups pumpkin puree
Directions
  1. Oil or spray your muffin pans (this recipe makes 24 muffins or 2 9" x 5" loaves) and preheat your oven to 350 degrees Fahrenheit.
  2. In a large bowl combine all of your dry ingredients, mix thoroughly so there are no chunks of any one ingredient.
  3. Mix in your wet ingredients and mix until smooth. 
  4. Pour into your pans and bake. Muffins take approximately 20 minutes loaves take about 45 minutes.


Please use caution when handling hot pans.

Saturday, 24 May 2014

Crescent Roll Pizza Pockets

Hi there,
So I don't know about you guys but my little guy loves pizza and I just can't bring myself to order pizza every time someone gets a craving. So I tried this recipe one day and my family just loved it. The extras can be reheated without drying out completely... although there are rarely left overs. This recipe is simple and delicious, a perfect meal for a busy week night without a whole lot of prep.

Ingredients:
2 cans Pillsbury Crescent Rolls
Pizza Sauce
Cheese
Assorted pizza toppings of choice

Procedure:
Preheat your oven to 350 degrees and line your pan with parchment paper.
Lay out one of your cans of crescent rolls and apply your pizza sauce to all but a small border around the outside edge.
Add your toppings and your cheese within this border as well.
Put another crescent roll over top of your toppings and cheese and press down the edges with a fork to seal the pocket.
Bake on the middle rack for about 30 minutes or until the pockets are golden brown.

Enjoy and please use caution when handling hot ingredients and utensils.


Wednesday, 21 May 2014

Pictures Update

Hi there I wanted to let you all know that most of the pictures are up the frozen peanut butter pie picture could not be saved so I guess I will just have to make it again... oh darn.

Homemade Scalloped Potatoes.

Is it just me or are potatoes the ultimate comfort food? They never get boring because there are so many ways to make them, I am getting hungry just thinking about them. One of my favorite ways to have them is scalloped. Many people think that they are hard to make but they really aren't. They may seem a little daunting if you do not know how to make them but this method is pretty easy. My grandmother was a cook most of her working life and this was how she made them.

Ingredients:

  • 6-8 medium to large potatoes
  • 1-2 cans of cream of mushroom soup (depends on the brand and size of the can)
  • 1 large onion
  • salt
  • pepper
Instructions:

  1. Grease your cooking pan. and preheat the oven to 400 degrees Fahrenheit.
  2. Slice your potatoes into 1/4 inch slices. You do not have to be exact this is only a guideline.
  3. Chop your onions into whichever size pieces you prefer and add them as well as your potatoes to your pan. 
  4. Sprinkle salt and pepper over your potatoes and mix in your cream of mushroom soup. You want your potatoes and onions to be covered in the cream of mushroom soup but you do not want it pooling around the bottom of the pan. 
  5. Cover your potatoes with aluminum foil and bake at 400 degrees for approximately an hour or until your potatoes are tender. You can tell if your potatoes are tender by poking a fork through them, if it easily goes through they are done, if it takes effort they are not. 
Please use caution when using an oven and handling hot dishes.

UPDATE: Here is the scalloped potato recipe, I did mine in the slow cooker on high for 3 and a half hours.

Confetti Squares

So one of my son's favorite snacks, and also one of my favorites of all time is Confetti Squares. This is another of my grandma's recipes she made them for me almost every week while I was pregnant with my son... maybe that's why he likes them so much. They always remind me of Easter because of the colors in them. By the way if there are any requests for recipes feel free to send them my way I am more than happy to oblige.

Ingredients:

  • 1/2 cup of butter or margarine
  • 1 cup of peanut butter
  • 1 regular package of butterscotch chips (or chocolate either is good)
  • 1 small package of the rainbow mini marshmallows 
  • 1 cup shredded coconut (sweetened or unsweetened either work well)
Instructions:

  1. First melt your butter, peanut butter and butterscotch chips. You can do this in the microwave or on the stove whichever method you prefer. If you are doing this on the stove however use a double boiler method so you don't burn it. 
  2. Remove this from the heat and stir in the coconut and marshmallows.
  3. Pour into an 8 x 8 inch pan or container and refrigerate overnight.
  4. Cut into squares and serve.
Just as a note these squares can be frozen if you prefer to save some for later.

UPDATE: Here is the picture for the confetti squares before they were cut.

Please use caution when handling hot ingredients.

Monster Cookies

Hi there so today I thought I would share with you one of my partner's favorite cookies. They are the ones he always asks for and they are gone in less than 2 days no matter how man I make. They are called monster cookies because they are meant to be big but I make them a lot smaller because of our little guy. The last thing this mama needs is a 2 year old with a sugar rush. This recipe is an adapted version of my great-grandmothers oatmeal cookie recipe, I hope you enjoy it.

Ingredients:

  • 1 1/2 cups all purpose flour
  • 1/2 tsp salt
  • 1 cup white sugar
  • 1 cup packed brown sugar
  • 2 eggs 
  • 1 tsp vanilla
  • 3 cups quick cooking oats
  • 1 tsp baking soda
  • 1 cup butter or margarine
  • 1 pkg of milk chocolate chips
  • 1 (200g) pkg of M&Ms
  • 1/2 cup baking jube jubes
Instructions:

  1. Preheat your over to 350 degrees Fahrenheit and line your cookies sheet(s) with parchment paper.
  2. Beat the butter and sugar until smooth. 
  3. Mix in the eggs and vanilla.
  4. In a separate bowl combine the flour, salt and baking soda. 
  5. Gradually mix this dry mixture in with the butter mixture.
  6. Stir in the oatmeal, followed by the chocolate chips, M&Ms and jube jubes. Your dough may seem crumbly but as long as when you squeeze it together it sticks it will be fine, otherwise you may add a little bit of water, but only add a small amount.
  7. Make your dough into balls and press them into your lined cookie sheets, leave some room between them so they do not attach when they expand.
  8. Bake for 10-12 minutes or until the bottom edges become slightly browned. Let cool for 5 minutes on the cookie sheet and let cool the rest of the way on a cooling rack.
Enjoy your cookies but please use caution when handling hot pans and hot cookies. Use common sense and protection.

UPDATE: Here is the monster cookie picture. I am glad I got the picture when I did because they were gone the next day.

Simple Deviled Eggs

One thing that never ceases to amaze me is how difficult people seem to think deviled eggs are. So to end this myth I thought I would share my recipe with you.

Ingredients:

  • 2 tsp Mayonnaise
  • 1 tsp White Sugar
  • 1 tsp Vinegar
  • 1/2 tsp salt
  • 1 tsp mustard
  • 6 eggs
  • paprika
Instructions:

  1. Boil your eggs and let them cool. 
  2. Peel the shells off and cut the eggs length wise.
  3. Remove the yolks and put them into a bowl.
  4. Mix in all of the ingredients except for the paprika.
  5. Put the mixture back into the eggs and sprinkle with paprika.
  6. Enjoy
UPDATE: This is the deviled egg picture


Simple Potato Salad

So spring is finally here and with it comes picnic season, lots of barbecues and lots of potato salad. This recipe is simple and even those who are not the biggest fan of potato salad might enjoy this. I am personally not a huge fan of potato salad but I will eat this. This recipe is simple and can be made either in stages or in a day.

Ingredients:

  • 2 lbs of potatoes 
  • 6 eggs
  • 1 lb of bacon (optional)
  • 1 onion
  • 2 cups mayonnaise
  • salt (to taste)
  • pepper (to taste)
  • 1/2 tsp celery salt 
  • 2 tsp mustard
Instructions:

  1. Boil your potatoes and your eggs thoroughly. Let them cool.
  2. Cook your bacon.
  3. Peel and chop your eggs and potatoes.
  4. Crumble your bacon and add to your eggs and potatoes.
  5. Chop your onion and add it to the bowl.
  6. Mix in 2 cups of mayonnaise, your celery salt, mustard, salt and pepper. 
  7. Chill and serve.
Enjoy your potato salad and please use caution when handling knives.


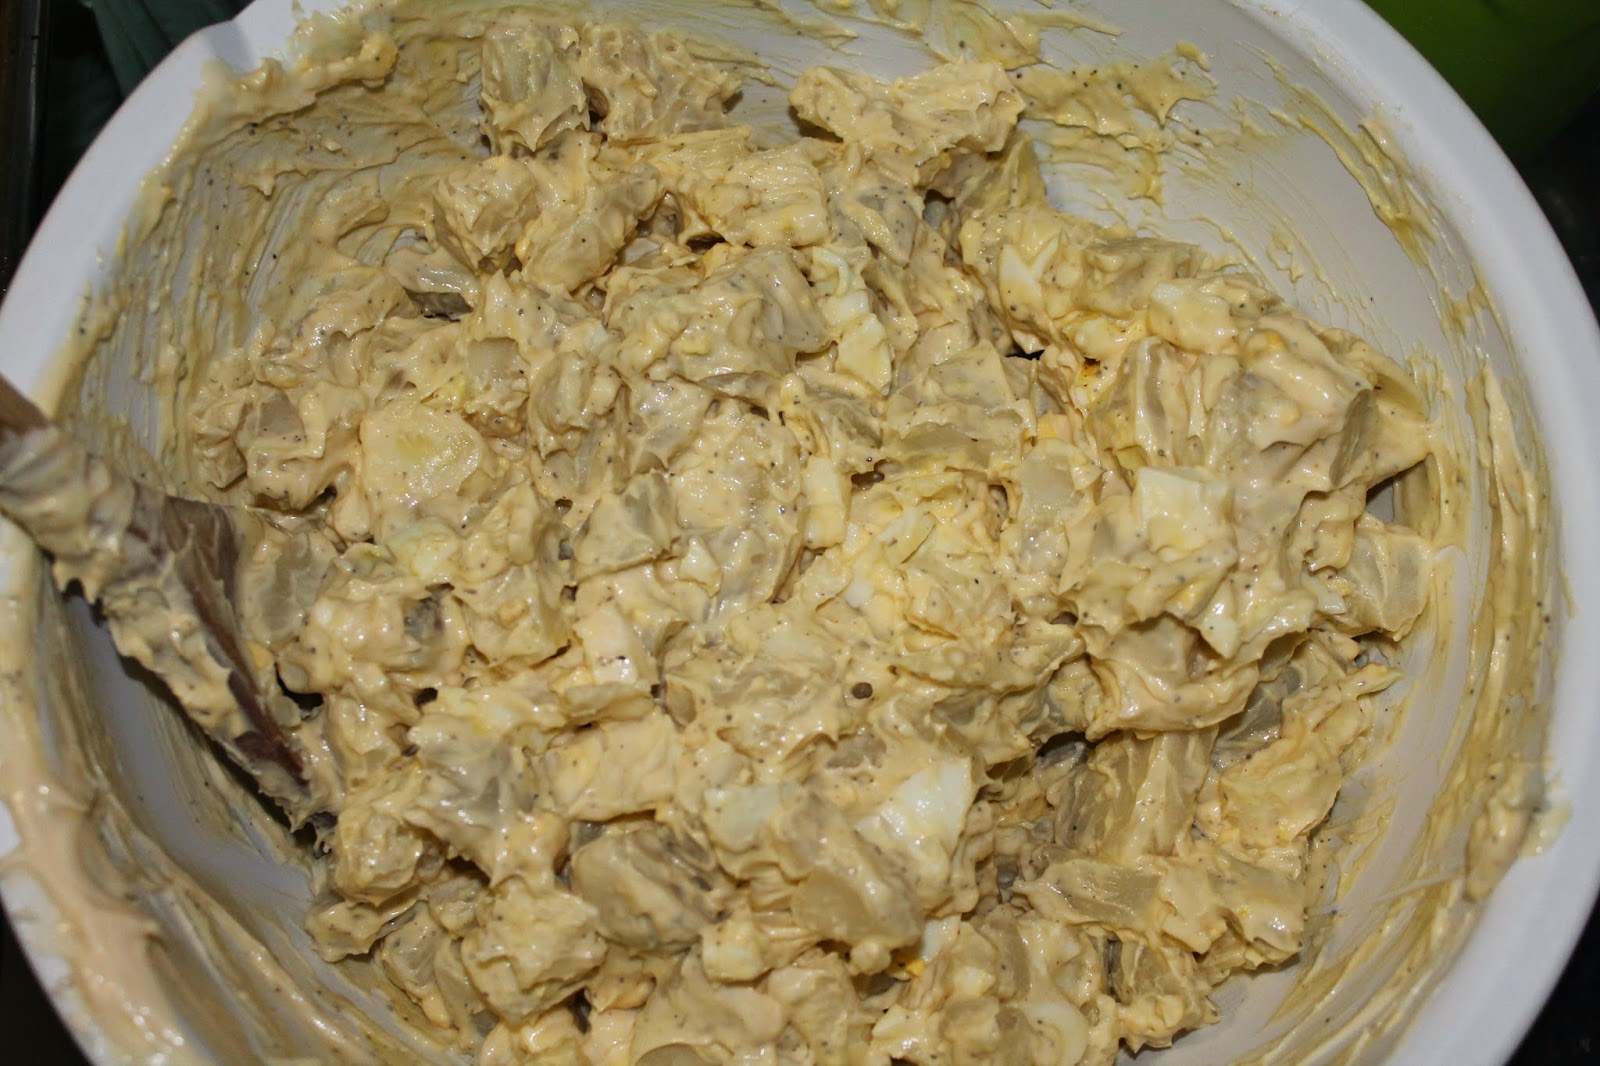
 UPDATE: This is the potato salad picture, I did not use bacon in mine but it was still amazing.


Kids Wall Art

Hi there,
So for those of you who have visited my facebook fan page you would have seen my announcement about expanding the blog. Most of the requests I got were to add a kids activity section. So as my first post on an activity to do with your kids (or by yourself if you prefer) I thought I would share a project I did with my son that he absolutely loved doing and they turned out so nice I actually want them displayed in my house front and center. This project was so fast and easy we did 3 canvases in an hour and my son loved every minute of it.

To do this project you will need

  • canvas
  • paint (3 colors)
  • primer (optional)
  • painters tape
  • a circular sponge dabber or brush
  • table covering
All you need to do for this project is to tape off the areas you don't want paint on. If you prefer to prime first by all means do so now. Priming will reduce bleeding through of the other paint and give you cleaner lines.You will see we did a letter 'C' for my sons name and we did stripes, as well as a chevron which is not shown.

The next thing you do is cover your table we used a garbage bag and taped it down with painters tape. Than you need to put out your paint.

Dip your brush or dobber in the paint and dot all three colors all over the canvases. there does not need to be a pattern in fact in my opinion the more random the better.

Let your master piece dry and remove the painters tape from the canvases and enjoy your paintings.


Friday, 16 May 2014

Fan Page on Facebook

Hello blogging community I have recently started a fan page for this blog please like and/or follow the page and invite your friends to do the same.

Updates

So recently I have been thinking about expanding to include posts about things other than cooking. I have been thinking about including some baby related projects as well as possibly some gift ideas. I am very open to suggestions so feel free to message me using the link which is now located at the side of the page under the "About Me". For new visitors to the blog I am a full time university student and a mom. I am doing a double major in psychology and sociology. I understand life is busy and sometimes it is just easier to buy things at the store but when I started really reading the labels on some of the things I was buying at the store I realized somethings were a lot healthier to make myself, not to mention cheaper. I also started realizing how many people were intimidated by making things themselves, things I had always been taught to make myself as many people in small towns are so I decided to start a blog about it.

Thursday, 15 May 2014

So Simple Fudge

If you can work a microwave you can make this fudge. This recipe my 2 and a half year old can almost make on his own, he just needs help with the hot ingredients. This fudge has all of the taste with none of the fuss and who doesn't like that. I know how busy every one can be myself included so finding a recipe that fits into that schedule is absolutely amazing some days.

Ingredients:

  • 1 1/2 pkgs chocolate chips (any flavor, regular sized bags)
  • 1 regular can sweetened condensed milk
  • 1 cup chopped nuts or mix-ins (optional)
Instructions:

  1. Put all ingredients into a microwave safe bowl.
  2. Melt until creamy (I usually do 30 second bursts and stir in between so I don't burn it).
  3. Pour into an 8 x 8 inch pan (I recommend lining this pan).
  4. Cool for at least 2 hours.
  5. Cut and serve.
See I told you it was simple. Enjoy.

UPDATE: This is the fudge before it was cut.

Monday, 28 April 2014

Pictures

Hi there,
Sorry there have been no pictures my camera is currently being fixed but they will be up soon :). Enjoy the recipes.
I have also fixed the problem with the message me part of the page it is located at the bottom of the page. Feel free to make requests.
Thanks
Jess

Thursday, 17 April 2014

Frozen Peanut Butter Pie

Hi there I have been searching for this recipe for months it is something we bring to all of our family get-togethers and everyone absolutely loves it. I finally found it inserted into some of my class notes from last term for some reason but I had to share it with everyone. This recipe is one of those recipes you have once and you are almost addicted to it. It is rich and creamy and oh so tasty.

Ingredients:

  • 1 pkg of cream cheese (1 (8 oz) bar)
  • 1 cup peanut butter (smooth)
  • 3/4 cup sugar (white granulated)
  • 1 cup thawed cool whip or 1 package of dream whip
  • 1 oz or 1 square of bakers chocolate (optional)
  • 1/3 cup finely chopped peanuts (optional)
  • 1/4 cup melted butter or margarine
  • 1 1/4 cup oreo cookie crumbs
Instructions:

  1. Melt your butter or margarine and in your pie plate mix it with your cookie crumbs and peanuts. Press into the pan to form your crust and put into the fridge to cool.
  2. Beat your peanut butter and cream cheese with an electric mixer (tip: it helps if you cut up your cream cheese before beating), mix until well blended. 
  3. Mix in your whipped topping, than pour over the crust and refrigerate. 
  4. Melt your chocolate and pour over your pie.
  5. Cover your pie and freeze it for at least 3 hours before serving.
Enjoy your pie I know I do.

Microwave Brown Sugar Candy

Well here we are at Easter. I think just being that time of year amps up my sweet tooth. One of the first things I make this time of year is my grandma's microwave brown sugar candy. My grandma was such a sweet lady, she really knew how to light up the room and she was absolutely hilarious. Now that she's gone I really try to bring out all of her favorites around the holidays just to keep her here in spirit. This was one of her favorites and I really hope you enjoy it too. It really is so simple I could make it in my sleep.

Ingredients:

  • 2 cups brown sugar
  • 6 tbsp of evaporated milk (not sweetened condensed milk)
  • 6 tbsp butter (not margarine)
  • 1 tsp vanilla
  • 2 cups icing sugar
Instructions:

  1. Boil the brown sugar, evaporated milk and butter in the microwave for 90 seconds, so put it in the microwave on high for about a 2 minutes 30 seconds (may vary depending on your microwave).
  2. Mix in the vanilla and icing sugar and whip until it starts to thicken. 
  3. Pour this mixture onto a parchment paper lined cookie sheet with a lip around the edge, you can also use plastic containers as long as they are lined with parchment paper. 
  4. Cut the candy into squares when it is at room temperature, you DO NOT want to do this if it is too cool or it will crack when you try to cut it.
This is one of my family's favorites and it really is a simple treat to suit almost any sweet tooth. I really hope you enjoy it.

UPDATE: Here is the brown sugar candy picture.

Please use caution when handling hot ingredients, sugar does stay hotter than water when boiling.

Hi Again, Home made Mac and Cheese

Hi there sorry it has been so long since I have posted I have had a very tough term in school. So much reading and so little time for this mama. Something I have been making a lot of lately is homemade mac and cheese my boys absolutely love it and it is so easy to do. I know the idea of homemade mac and cheese sounds like a handful but it really is quite easy once you know what you are doing. It is also something you can make ahead and bake later which is awesome for busy nights... or exam time in our case.

Ingredients
For the mac and cheese:

  • 8 oz of macaroni noodles (really any style noodles will work) or 3 3/4cups of noodles
  • 2 tbsp of margarine or butter
  • 1 small onion chopped up finely
  • 1 tbsp of flour 
  • salt, pepper and paprika to taste (I usually use half a tsp of each personally)
  • 1 1/2 cups milk 
  • 2 cups shredded or grated cheese
For baking

  • 3/4 cups of bread crumbs
  • 2 tbsp butter or margarine melted 
  • 1/4 tsp paprika
This will make enough for 6 servings.

If you are baking this right away preheat your oven to 350 degrees and grease a 2 quart casserole dish (you can grease the dish however you prefer I usually use vegetable oil or butter).

Bring some water to a boil in a large pot. When the water is boiling pour in your noodles, carefully so you do not get splashed by the boiling water. You want to cook your noodles until they are just cooked, they will still be firm and not mushy. Drain your noodles and put them into your casserole dish.

Melt your butter in either the pot you just used to cook your noodles or in a sauce pan whichever you prefer. stir in your onions (this will take about 5 minutes maybe less depending on the temperature of your burner). Add your milk, flour, salt, pepper and paprika, stir well. You will cook this mixture until it starts to thicken, you will want to stir often or it will stick to the pot.

Once thickened take the pot (or saucepan) off of the heat and  stir in your cheese until melted. Pour this into your noodles and stir.

Melt your butter for baking and mix in the bread crumbs and paprika. You will then sprinkle this over your noodles. If you are going to bake this right away put it in the oven, otherwise cover and cool until you are ready to bake.

Bake the mac and cheese until the top is golden brown and bubbly. This is about 20 minutes if you are doing it right away but longer obviously if it has been cooled or frozen. Do not worry if your bake time varies, every oven is completely different.

Please take care to wear the appropriate "equipment" when working with hot dishes and enjoy your meal.